Cookie
FlexiHub Team uses cookies to personalize your experience on our website. By continuing to use this site, you agree to our cookie policy. Click here to learn more.
USB over Network

FlexiHub Tips for USB-over-network Sharing

Hi! I'm Olga Weis, a technical writer for Electronic Team, Inc., the company behind FlexiHub. My credentials can be found at https://www.electronic.us/author/olgaweis/.

At many points in my life, I've had to use remote workstations and cloud PCs. Similarly, there were a lot of cases when I wanted to temporarily share a USB device to someone else.

FlexiHub is pretty useful in both of these cases - it works over the Internet, after all - but there are a few nuances you should know.

Additionally, if you're interested in trying it for the first time, refer to the "How to Share..." section of the article. It's not complicated at all!

Olga Weis Olga Weis Last updated Oct 26, 2026

Two main approaches to USB over Network passthrough

It's good to know the inner workings of any software you use, and FlexiHub is no exception (https://www.flexihub.com/security/). If FlexiHub is failing to establish a direct connection and defaulting to UDP, this can cause trouble.

UDP is pretty fast, but it doesn't confirm if a sent packet has reached the destination. This can actually cause it to be slower if an application needs all the packets to be delivered, and has to manually request resends, instead of relying on the faster TCP.

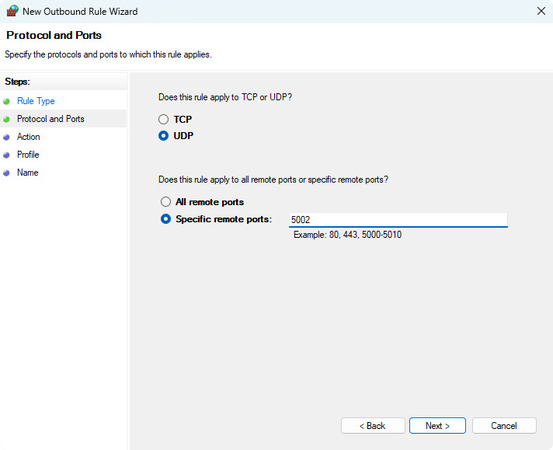
How do you disable UDP in FlexiHub? It's simple. Block port 5002, inbound and outbound. On Windows, this is done from Windows Defender Firewall, while on Linux you need a solution like UFW (with GUFW available if you prefer GUIs). Windows Firewall rule creation - Windows: use the Windows Security icon on the Taskbar to open Windows Defender; go to "Firewall & network protection" > "Advanced settings"; click "Outbound rules" and "New rule..."; specify the port; repeat for inbound.
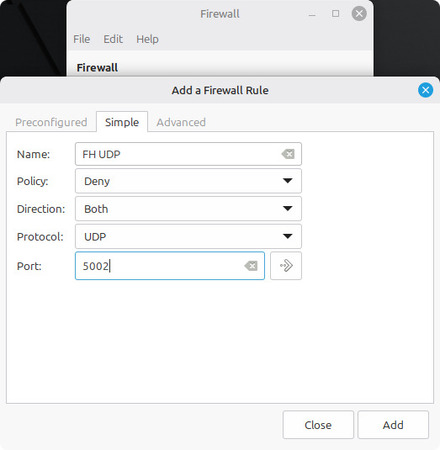
Linux UFW rule creation - Linux: open GUFW (install it if not installed yet); go to the Rules tab and select the Public profile; click "+" and switch to the Simple mode for rule creation; specify the port and confirm rule creation.
Tip #2: Use Isolation with Multi-user Systems!

Luckily, I didn't have to learn this the hard way. But it certainly could have happened!

Due to the way FlexiHub works - by running a system service - any user on a given system will be able to see all devices available to other users.

You can circumvent this by selecting "Device Isolation Components" when installing the app on the multi-user computer. And don't forget to enable it!

Tip #3: Always Choose Single-use Tokens

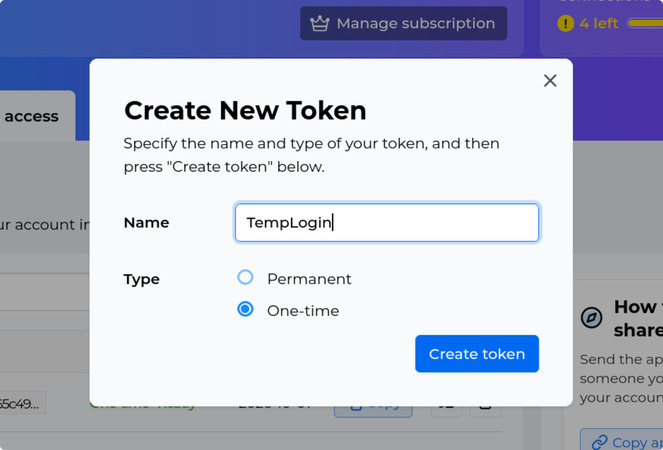
FlexiHub one-time login token generation Never rely on other people to maintain your security for you! When a relative of mine got compromised (it was one of these tech support scams), I didn't worry about the FlexiHub client installed on his system. Do you know why? Because I gave him a single-use login token!
My computer was on and I was away at the time. If the hackers got access to my FlexiHub account through a reusable token, or worse - through my email and password - they could get data from my flash drive, or take a peek at my room through the webcam. But I knew I was safe.

In case you don't know how this is done: just sign into the FlexiHub web suite at https://account.flexihub.com/, click "Shared access", and "Create token"! Any created tokens can also be deleted from the same menu.

Tip #4: It's RPi-compatible

While it's easy to view FlexiHub as a desktop-only app, you should remember that it's also available on other, less expected platforms, such as Raspberry Pi and Android. If you have an RPi as a home server, enhance it with FlexiHub, and make access to your USB NAS easier! Alternatively, if your Android device lacks OTG, this can be temporarily alleviated with FlexiHub (it's right there in the name).

How to Share USB Over Network

This is a way to quickly get started with FlexiHub. As soon as you create an account, you get 5 free connections as a part of the Demo! Learn more about the FlexiHub plans at https://www.flexihub.com/prices/.
  • 1.
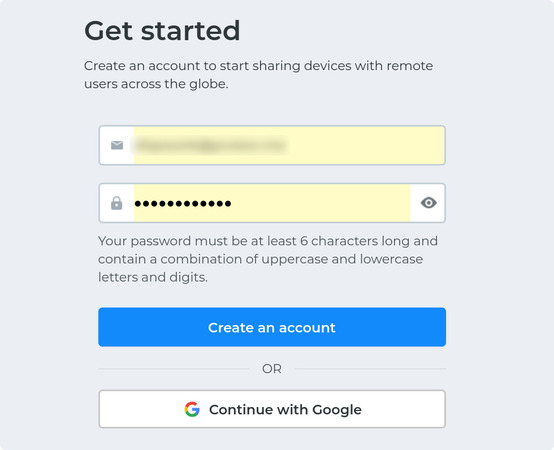
    Go to https://account.flexihub.com/user/registration/ and sign up.
    FlexiHub sign-up page
  • 2.
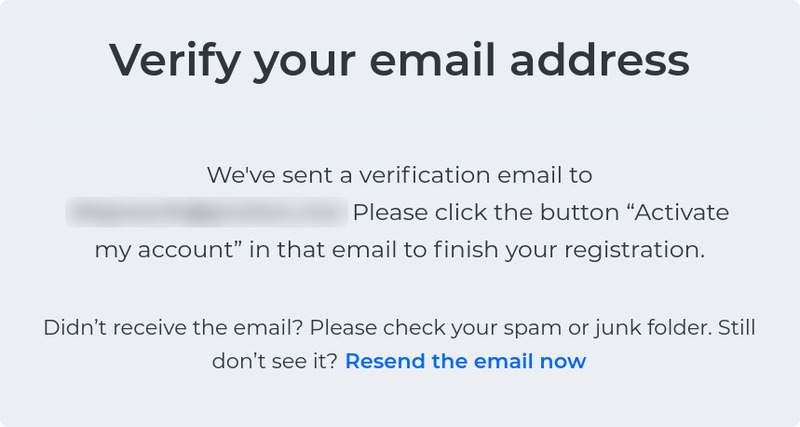
    Confirm your email address.
    Note about email address verification after you sign up
  • 3.
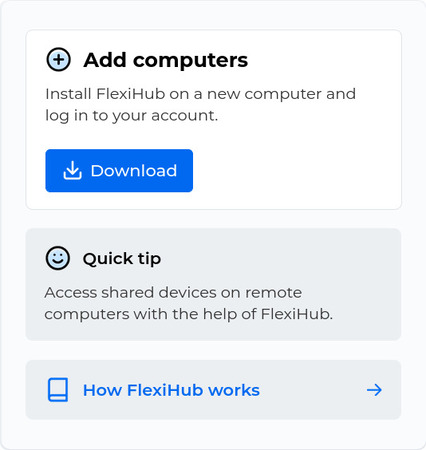
    To download FlexiHub, use the “Add computers” section when you’re logged in.
    FlexiHub download button in the web suite
  • 4.
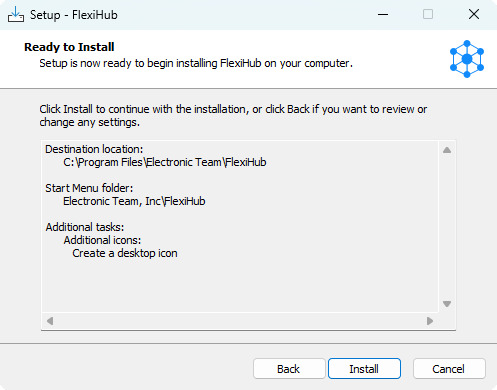
    Install FlexiHub on both machines that will share their USB peripherals.
    FlexiHub installation process
  • 5.
    Sign in on both machines. blank
  • 6.
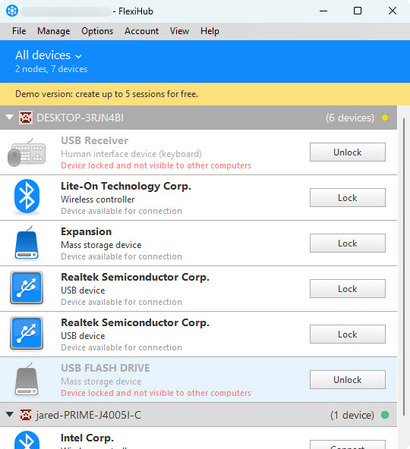
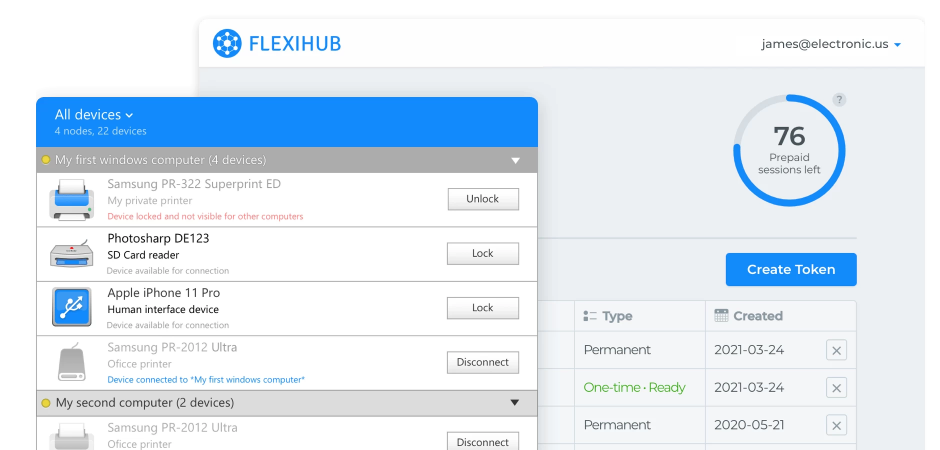
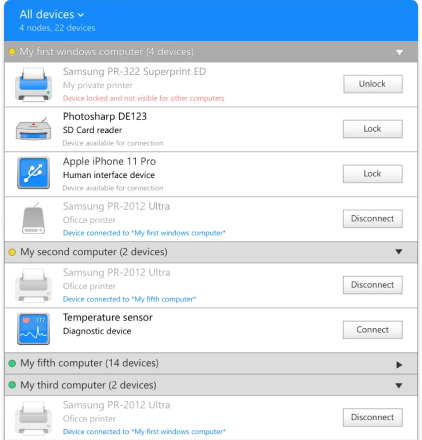
    A FlexiHub client will immediately show any connected USB devices to other clients on the same account. Click "Connect" on the other machine to start using a remote USB device!
    FlexiHub UI demonstration

Note: Use Lock/Unlock to control which USB devices are accessible from other FlexiHub instances signed into your account!


Connect to USB over network with one click
  • 4.8 overall rank based on 386+ users
  • Requirements: Windows, macOS, Linux, Android and Raspberry Pi.
  • 11.63MB Size.
  • Version 7.0.15594. (19 May, 2026).
  • Pricing starts $39 per month
Connect to USB over network with one click