Cookie
FlexiHub Team uses cookies to personalize your experience on our website. By continuing to use this site, you agree to our cookie policy. Click here to learn more.
FlexiHub

USB For Remote Desktop: A Definitive Guide

One of the challenges faced when connecting to computers over the RDP protocol is when it is needed to use local USB devices on a remote desktop. If you are running an application on a remote server over RDP, connecting some USB devices to the remote desktop can pose various difficulties.

Olga Weis Olga Weis Last updated May 2, 2022

This article will describe an effective software method that makes enabling remote desktop USB redirection relatively easy. Read on to learn the detailed steps for connecting USB to the remote desktop, and find out what challenges may arise when using USB over RDP.

Software for redirecting USB devices in remote desktop

FlexiHub by Electronic Team, Inc is a software tool developed to provide access to USB peripheral devices for use in remote desktop sessions.

When using the app to create a USB remote desktop connection, devices can be used on the remote machines with the same level of functionality as if they had a direct physical connection.

💡 FlexiHub makes it easy to access USB devices in remote desktop session, and avoid the most common issues related to redirecting USB over RDP.

How does USB for Remote Desktop software work

FlexiHub works by sharing the USB ports of the local computer with remote desktop instances. This makes it possible to access USB devices in remote desktop sessions as soon as they are plugged into the local machine.

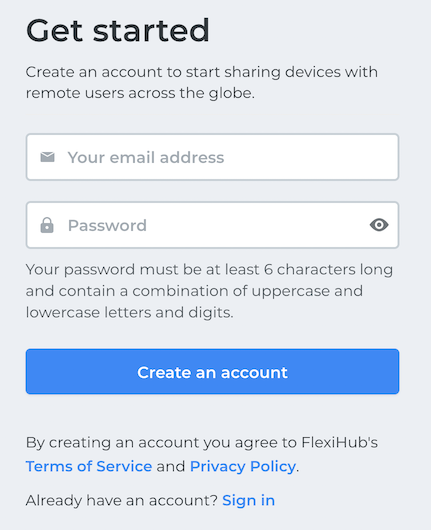
FlexiHub offers users a user-friendly and efficient method of setting up USB redirection in remote desktop environments.

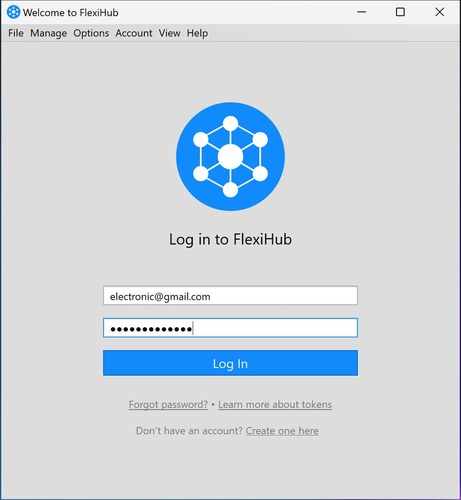
Here is the demonstration of FlexiHub in action, and how it connects USBs to remote desktop:
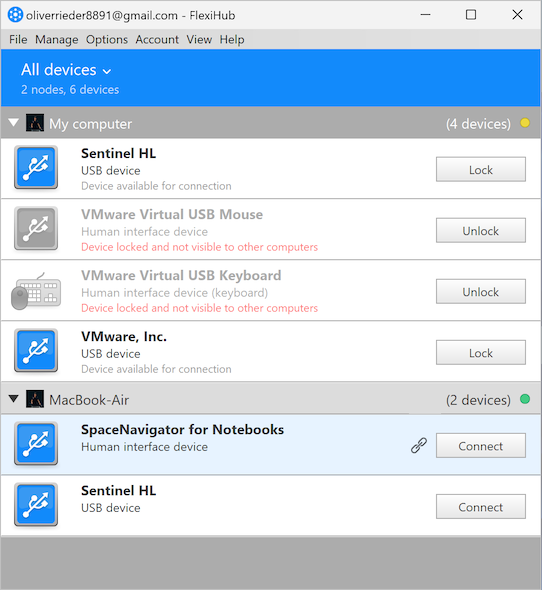
Unlike some other solutions, there are no separate server and client instances that need to be installed. The application presents users with a unified interface that displays all available devices for remote desktop USB passthrough.

No special system configuration is required to run FlexiHub and it supports a wide range of USB devices.

How to redirect USB to remote desktop

Follow these steps to connect USB devices to a remote desktop:
  • 1.
    Create your FlexiHub account on the software's official website and verify it via email.
    The FlexiHub interface will display
  • 2.
    Download and install FlexiHub on all the computers that will take part in the RDP USB passthrough. Install the software on the computer that is physically attached to the peripheral as well as any remote machines that require access to the device. blank
  • 3.
    Start the application and log into your FlexiHub account. After that, the device is immediately made available for USB over RDP connection.
    log in to your account
  • 4.
    Start an RDP client and then connect to a remote desktop using your credentials.
    start an RDP client
  • 5.
    Launch FlexiHub in the remote desktop session and log into the account with the credentials used previously.
    log in to your account
  • 6.
    The FlexiHub interface will display all of the shared USB devices that are available for a remote connection. Click the Connect button next to the name of the device you want to access.
    click connect next to the device you want to access

Advanced FlexiHub features for using USB in remote desktop

  • 1.
    FlexiHub securely transmits data using 2048-bit SSL encryption offering an extra layer of data protection. This keeps your data safe from misuse by other third parties.
  • 2.
    FlexiHub automatically detects devices connected to the server. As soon as a peripheral is attached, the app detects it and enables it to be shared with clients. You can use 3D mouse in remote desktop, webcams, keyboards, smart card readers, and share many more types of USB devices quickly and easily.
  • 3.
    The application does not require a public IP address since it uses a proprietary redirection server for sharing USB devices. This allows computers that can’t detect the server to still connect an RDP session and the USB device.
  • 4.
    FlexiHub does not require you to install USB drives on the remote machine when it connects a USB device to an RDP session.
  • 5.
    FlexiHub supports remote desktops running on the Windows, Mac, and Linux platforms. You can connect to a USB device from any protocol including Microsoft Terminal Services, Azure, Hyper-V, VMware, Citrix XenDesktop, and many others.
Device Isolation for Multi-User Systems
Private FlexiHub sessions with exclusive USB and COM device access for one specific user account.
isolationFeatureImage

Redirecting USB over RDP protocol - potential difficulties

You can use native operating system capabilities to redirect USB devices over RDP but you may run into difficulties. Certain devices work better than others because of certain issues such as bandwidth and network latency.

An example can be seen with USB devices that need consistently high throughput. Latency may impact their functionality in a VDI session. Another problem can come up with USB 3.0 devices attempting to use a USB 2.0 port on the client.

When sharing USB devices over RDP, an IT team needs to keep in mind the performance requirements of the peripheral equipment.

Factors to consider when sharing USB over RDP
  • The state of the network is crucial when using USB audio devices. Unreliable networks are not recommended for these devices, as they need high throughput even when idle.
  • Webcams are not supported when forwarding USB over remote desktop due to high bandwidth requirements that usually exceed 60 Mbps.
  • The performance of USB scanners is directly related to the network’s state and scans may take longer than anticipated.
  • WANs can pose latency and reliability issues that impact the performance of USB devices. An example of the problem is illustrated when reading a large file across the WAN. Each read request demands three two-way transfers between the remote desktop and a device. A small difference in network latency can be compounded over multiple requests to cause substantial performance degradation.
  • Performance can be impacted by the file structure used on large USB disks. These can take a considerable amount of time to be recognized in an RDP session after being connected for the first time. Unreliable network links result in multiple retries which reduces performance. Using NTFS instead of FAT as the underlying filesystem can speed up connection time.
  • USB CD/DVD readers, scanners, and touch devices also exhibit problems when used on a WAN with latency issues.

How to Set Up Remote Desktop Connections

When working over LAN, if you want to create a Remote Desktop connection you’ll need to configure the computer that will be accessed remotely to accept the incoming connections first.

The following steps show how to use Microsoft Remote Desktop and set it up via Windows Control Panel.

Allow remote access via Remote Desktop

Here is what you’ll need to do to allow the remote desktop connections to a selected machine:

  • 1.
    Open Control Panel.
  • 2.
    Go to the System and Security section of the Windows Control Panel. system and security control panel
  • 3.
    In the System section, locate and choose the "Allow remote access" option. allow remote access control panel
  • 4.
    Select the Remote tab.
  • 5.
    In the Remote Desktop section of the displayed window, select the “Allow remote connections to this computer” option. allow remote connections to this computer
  • 6.
    To ensure secure connections by enforcing stronger authentication, it is recommended that you check the “Allow connections only from computers running Remote Desktop with Network Level Authentication” box.
  • 7.
    Finally, Apply new settings.

Once you have completed these steps, the target computer will be configured to accept Remote Desktop connections. You will need to manually configure firewall rules if you are using a third-party solution. If you are using the default Microsoft Defender firewall, the system will automatically add the rules required to enable Remote Desktop sessions.

How to use Remote Desktop Connection Manager

After configuring the selected computer to allow remote connections, your local machine can access it with a Remote Desktop connection.

  • 1.
    Launch the Remote Desktop Connection app. E.g. you can use the Windows search and type in “Remote Desktop Connection”. Select the result returned by the search. search remote desktop connection
  • 2.
    Provide the remote computer’s IP address or network name in the Computer field of the Remote Desktop Connection app.
  • 3.
    Click on the Show Options button to enter the credentials that will be used when you connect with a Remote Desktop connection. You have an option to save the credentials to avoid having to enter them on subsequent connections by checking the "Allow me to save credentials” box.
  • 4.
    After filling the Computer and User name fields, click the Connect button. connect to remote computer rdp
  • 5.
    Next, you will need to enter the password for the account in the displayed window. You can save the password for future connections by selecting the “Remember Me” option. You may be presented with a message indicating the remote computer’s identity cannot be verified. You can get around this issue by checking the "Don't ask me again for connections to this computer” box. When finished, click Yes. the identity of the remote computer cannot be verified
  • 6.
    After that, the connection to the remote machine will be established, allowing you to access the computer and perform activities like viewing files or running programs. A blue bar at the top of the screen provides multiple options to manage the remote connection. remote desktop controls Buttons located on the right side of the bar let you end the session, modify the window size, or minimize the connection window to the taskbar. You can also pin the bar or check its connection speed with buttons on the left side of the bar.
  • 7.
    Simply click the Close icon when finished working to end the connection.

Frequently Asked Questions

USB redirection (Universal Serial Bus redirection) is a technology that enables users to access peripheral devices connected to a USB port from remote applications or desktop sessions.
FlexiHub is available for Windows, Linux, and Mac computers and offers true cross-platform compatibility. Servers and clients in any combination of operating systems can be used to share USB devices over an IP-based network. A server on a specific platform can share devices with clients no matter what OS they are using.
USB devices such as scanners are not prime candidates for redirection due to their high resource demands. One issue is the scanner’s use of back-to-back processes that are affected by network bandwidth or latency. Redirecting traffic from a USB scanner may result in decreased device performance.
Download and install FlexiHub on the machine with the physical connection to the peripheral device. Then, install it on the computer that will remotely access the device in a remote desktop session. Open FlexiHub, locate the USB device and click the Connect button.
Connect to USB over network with one click
  • 4.8 overall rank based on 386+ Reviews
  • Requirements: Windows, macOS, Linux, Android and Raspberry Pi.
  • 10.45MB Size.
  • Version 6.1.15025. (19 Feb, 2024).
  • Pricing starts $14 per month billed annually
Connect to USB over network with one click