Cookie
FlexiHub Team uses cookies to personalize your experience on our website. By continuing to use this site, you agree to our cookie policy. Click here to learn more.
Olga Weis Olga Weis Last updated Feb 28, 2023

How to Access Hardware USB from VirtualBox Guest OS

VirtualBox USB Passthrough Without Limitations

VirtualBox is not alone in its lack of USB support. Many other virtualization applications also suffer a case of this limitation. Fortunately, there is a software solution called FlexiHub that allows users to connect USB to virtual machines in VirtualBox.

This USB to VirtualBox software enables your guest OS to access USB devices attached to any network-connected machine, not just the host operating system.

How to Easily Access Your USB on VirtualBox Guest OS

To access your USB on VirtualBox Guest OS, simply follow the steps below:
  • 1.
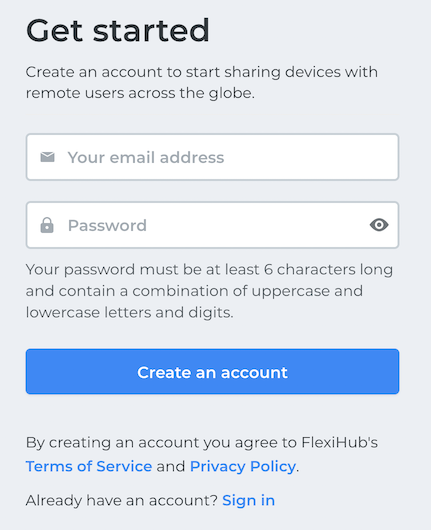
    Sign up for a FlexiHub account. You can also register your account from within the app.
    Sign up for a FlexiHub account
  • 2.
    Download the software and select the required number of connections to start a free demo period.
    Download the software
  • 3.
    Install the software on both the host and guest operating systems.
    Install the software
  • 4.
    Launch FlexiHub on both machines using your FlexiHub login credentials.
    Launch FlexiHub
  • 5.
    Use the FlexiHub window on the guest operating system to locate the USB device you want to access, then click ”Connect.”
    Use the FlexiHub window on the guest operating system

Note: May occur the problem on machines where VirtualBox is installed. After plugging a USB device into a USB port of the computer or after sharing/unsharing a USB device with FlexiHub, VBoxUSBMon.sys driver may crash causing BSOD.

To fix this issue, you can stop VBoxUSBMon.sys driver or use another virtual machine instead of VirtualBox.


That’s all you need to do to implement USB passthrough VirtualBox. During the virtual session, you'll be able to use the USB device just as if it had a direct connection to the virtual machine. FlexiHub is a fully cross-platform solution and supports Windows, Linux, Android, and Mac operating systems.

VirtualBox USB video tutorial

Native Method for VirtualBox USB Passthrough

VirtualBox USB support has many uses. Mainly, it can be used to back up data from a guest operating system and copy documents from virtual drivers for printing from VirtualBox or sharing with other people. In addition, USB support is a feature that makes using a virtual machine more convenient for most VM users to access and manage data from their virtual hard disk.

VirtualBox makes it possible for users of virtual machines to connect their USB devices to the guest OS with a USB controller. However, when a USB device is connected to the computer, its connection will be redirected to the guest OS, making it unavailable in the host OS.

How to connect USB in Virtual Box

To easily connect USB in Virtual Box, here’s what you can do:
  • 1.
    First, you need to install the VirtualBox Extension Pack.
  • 2.
    After installation, start your virtual machine under whichever supported guest OS you choose.
  • 3.
    Plug the USB device into an open USB port on the host computer.
  • 4.
    Navigate to Devices -> USB, and click on “USB device to share
  • 5.
    Add USB to Virtualbox

    Note: FlexiHub is compatible with all OSes, and you may work in VirtualBox without any limits.

  • 6.
    After VirtualBox accesses the USB device, it will appear in the guest operating system. Your VM will have access to the same functionality as if it was a direct connection. That allows you to connect iPhones to VirtualBox and other USB devices remotely. An important note: only one virtual or physical machine can access the USB device at any given time.

Access USB in VirtualBox with filters

With Virtualbox USB filters, you can get a specific USB device mounted in your VirtualBox VMs in the default mode.

Once USB support is enabled for a virtual environment, you’ll be able to control which devices will be connected to the guest OS automatically. Filters allow you to connect USB to VirtualBox automatically according to specific parameters. Devices that match your designated filters will be automatically connected to the guest OS once linked to the host.

FlexiHub
4.8 Rank based on 386+ Reviews

Besides, devices that do not match the filter won’t be excluded from further use in the guest session. Instead, they can be added manually to the guest through the operating system’s Device -> USB menu.

The Virtualbox USB Device Filters window is where you create new filters. You can name them for easy reference and specify different criteria for each filter. You can keep close tabs on selected devices by creating as many filters as you need.

VirtualBox USB Device Filters window

When setting up a VirtualBox USB drive on Windows 10, you’ll have to unplug and reconnect your connected USB drives. Otherwise, the said device won’t be affected by filters created to control its behavior.

Enable VirtualBox USB Passthrough on Different Operating Systems

What troubles most VirtualBox users is how USB support for their virtual machines powered by VirtualBox isn’t enabled from the get-go.

Unfortunately, connecting a flash drive to the virtual machine right after installation isn’t viable, even on VirtualBox's latest versions. This functionality still hasn’t been worked on by its developers.

However, this doesn’t make USB support on VirtualBox impossible. In fact, it’s pretty easy to set up. All you have to do is follow a few simple steps that may vary depending on your host OS (Mac or Linux).

To learn more, read the easy-to-follow guide we prepared for you below:

Steps to access USB in VirtualBox on MacOS, running Windows guest OS

To allow your USB device to pass through your macOS and connect directly to your Windows OS running in your virtual machine, simply follow the steps below:
  • 1.
    Make sure to exit your Windows VM before proceeding with the steps below.
  • 2.
    Open VirtualBox.
  • 3.
    Open VirtualBox’s Settings, located in the menu.
  • 4.
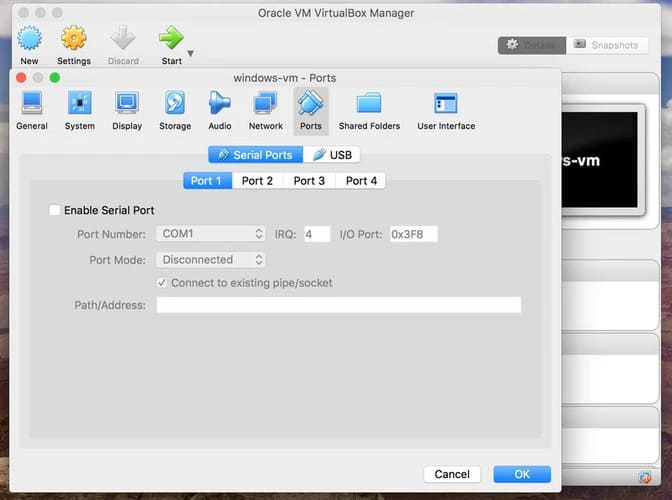
    Click on Ports, located in the top-right portion of the Settings window, the third option from the last.
  • 5.
    Select the USB option. Originally, the port setting will be set to “Serial” by default.
    virtualbox manager

    Note: USB 2.0 transmits data faster than USB 1.1.

  • 6.
    Connect your USB device to your Mac.

    Short brief: In the following parts, we’ll be selecting which USB device to allow to pass through to our Windows VM. This is to keep the USB connection to the Windows VM as long as it’s running or whenever it’s plugged into the device.

    When the VM is closed, the USB connection will automatically transfer to the macOS.
  • 7.
    Now, add your USB to the list of USB device filters. Click on the “plus” icon on the right side of the Ports window.
  • 8.
    Select your USB from the pop-up list that will appear.
    virtualbox manager
  • 9.
    Once successful, your chosen USB device will be displayed under the “USB device filters” list.
  • 10.
    Close the Settings window and go back to the main VirtualBox window.
  • 11.
    Safely eject your USB device from your Mac.
  • 12.
    Launch Windows VM. Launch Windows VM

When you connect your USB device to your Mac after launching your Windows VM, it will automatically connect to the guest OS’ virtual hard disk.

Note: Your USB device will not appear in your Mac’s Finder when the virtual machine is running. If you want it to appear on your macOS, closing the virtual machine and re-inserting the USB will do the trick.
FlexiHub
4.8 Rank based on 386+ Reviews

Steps to connect USB in VirtualBox on Linux

Connecting a USB in your VirtualBox on Linux will differ from doing it on macOS. But, it will still be as easy. To access your USB on VirtualBox Ubuntu, follow the step-by-step procedure we’ve prepared for you below:
  • 1.
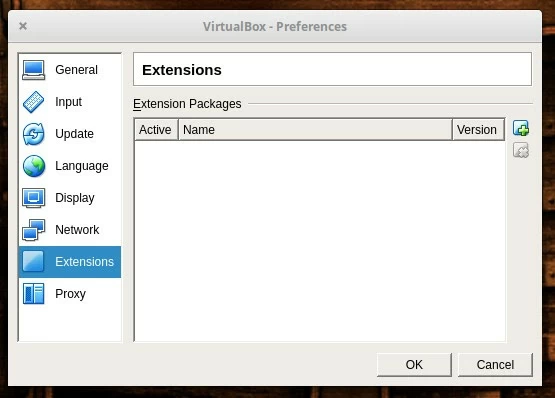
    First, install VirtualBox USB 2.0 and 3.0 support extension pack.

    Note: VirtualBox, by default, supports only USB 1.1 devices. Installing the said extension pack is necessary to proceed with setting up VirtualBox USB support if you have USB 2.0 devices or higher.

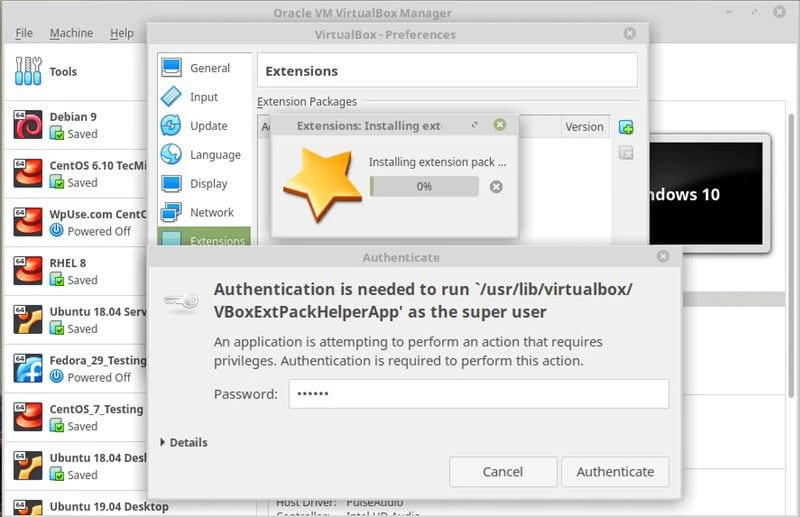
    VirtualBox preferences Make sure that you install the extension pack that is compatible with your VirtualBox version.
  • 2.
    Enter your sudo password in the “Authenticate” window after the download is completed.
    Enter your sudo password
  • 3.
    Open VirtualBox’s Extensions settings. Go to File > Preferences > Extensions.
  • 4.
    On the right side of the Extensions window, click on the “plus” icon to add the VB Extension Pack.
  • 5.
    Select the extension pack.
  • 6.
    Click on “Install.”

    Note: You will see the newly added features in the installation description.

  • 7.
    Select “Agree” right after reading VirtualBox’s terms and conditions.

Add your “User” to the “vboxusers” group

After installing the extension pack, the next step would be to add your User account to VirtualBox for it to detect your USB. Here’s what you can do:
  • 1.
    First, open a Terminal Window with the shortcut key (Ctrl + Alt + T).
  • 2.
    Next, input the command “sudo gpasswd -a x vboxusers” with the variable x replaced with your username.
  • 3.
    Next, log out of your account and log in again for the changes to apply.
  • 4.
    Open Terminal Window again and check which user group you belong to by inputting the command “groups x” with the variable x replaced with your username.

Next, enable USB control & add new USB filters

  • 1.
    Open your VirtualBox Settings.
  • 2.
    Open the USB tab and select between USB 2.0 or 3.0, depending on your USB device.

    Note: Only one can be enabled.

  • 3.
    Insert your USB device.
  • 4.
    Add your USB device. Click the “plus” icon on the right side of the window and select your USB device.
  • 5.
    Click OK.

The last step

With your USB still plugged in, run your VM. Your VM should be able to detect the listed USB device, while your host OS will not be able to access it unless the VM is closed.


To unmount USB device from your guest OS:
  • 1.
    Go to your list of connected USB. Open Devices > USB.
  • 2.
    Untick the box next to your USB device.
  • 3.
    To enable USB in VirtualBox again, simply tick the box again.

Despite this feature not being readily available on VirtualBox, setting it up manually takes no time at all. Following these steps above is very easy, even for new VirtualBox macOS and Linux users.

Conclusion

To access your USB from your virtual machine, it will take a few extra steps after the installation of VirtualBox. But, worry not, because it’s quite easy. You can connect your USB to your devices and pass through macOS and Linux by modifying a few settings in your VB software. After completing the steps above, you’ll be able to connect your USB to your virtual machine automatically every time you connect your USB drive or reboot your device.

Efficient VirtualBox USB passthrough service
  • 4.8 overall rank based on 386+ Reviews
  • Requirements: Windows, macOS, Linux, Android and Raspberry Pi.
  • 10.45MB Size.
  • Version 6.1.15025. (19 Feb, 2024).
  • Pricing starts $14 per month billed annually