Cookie
FlexiHub Team uses cookies to personalize your experience on our website. By continuing to use this site, you agree to our cookie policy. Click here to learn more.
FH recover MAC
Olga Weis Olga Weis Last updated Oct 10, 2023

Reviving and Restoring Unresponsive Macs Remotely

Mac users may need to look for a professional repair service if their computer appears to be dead or becomes unresponsive. The specific symptoms that might require this type of service include:

  • • An unresponsive Mac or MacBook that does not respond to commands or will not start up;
  • • A failed installation process that does not complete macOS updates;
  • • A failed macOS reinstallation that produces errors and fails to finish.

A revive or restore process is often required to return the faulty Mac to an operational state. Technicians can perform this process remotely from any location and restore the Mac over the Internet with the help of FlexiHub. The reanimation procedure is performed by remotely accessing the machine in Device Firmware Update (DFU) mode.

A technical service professional can easily restore a Mac remotely using FlexiHub connectivity software. With a FlexiHub subscription, a technician can establish highly secure and effective connections between their workstation and the remote MacBook via a USB connection and the Internet. Employing this cost-effective approach enables a technician to efficiently diagnose and resolve Mac issues from anywhere in the world.


How to Revive a MacBook to Factory Settings Over the Internet

FlexiHub offers users a streamlined method of reviving a MacBook that saves time, money, and effort. FlexiHub’s remote access capabilities let users create secure connections to network-attached remote devices. The following steps demonstrate the ease with which FlexiHub can restore a Mac over the Internet.

Note: For convenience, we will be using the following abbreviations:
Technician's Mac: A host computer running FlexiHub that initiates a remote connection.
Intermediate Device: A computing device (such as a smartphone, tablet, PC, or Mac) running FlexiHub that is being connected to remotely.
Serviced Mac: A malfunctioning Mac connected to an Intermediate Device via a USB cable.


  • 1.
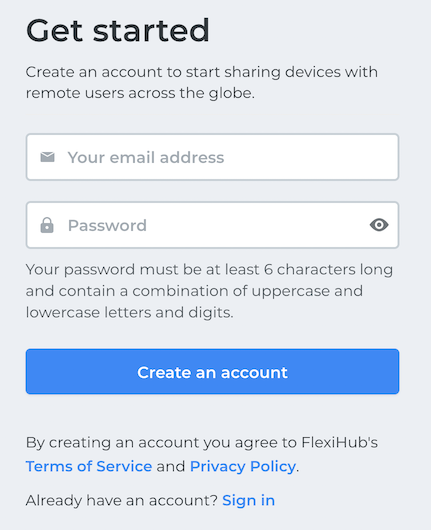
    Register a Flexihub account and install the software on the technician’s computer that will be used for the remote restore.
    Started
  • 2.
    FlexiHub also needs to be installed on the Intermediate Device that will be connected to the Serviced Mac. The software is compatible with Windows, macOS, Linux, Raspberry and Android machines. blank
  • 3.
    Connect the Serviced Mac computer to the Intermediate Devic (Android phone) running FlexiHub using a USB-C cable. blank
  • 4.
    The Technician’s Mac uses FlexiHub to connect to the Serviced Mac that needs to be revived or restored. Once the connection is established, the technician can perform the revive process remotely. blank
  • 5.
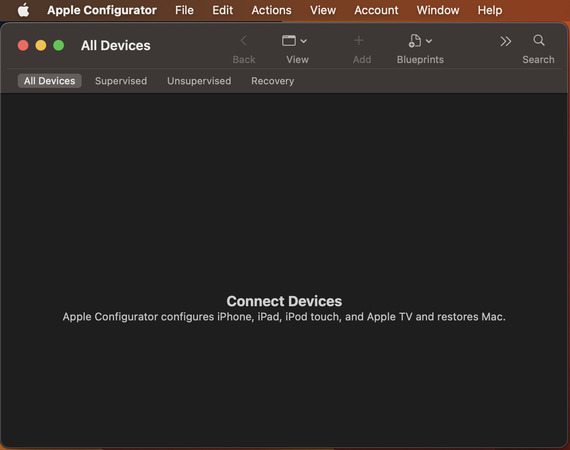
    Launch Apple Configurator from the Applications folder on the Technician’s Mac.
    apple confifutaror interface
  • 6.
    Restart the faulty Mac using a special key sequence. The specific sequence depends on the type of Mac you are attempting to revive. blank
  • 7.
    The technician uses Apple Configurator to revive the Serviced Mac. blank
  • 8.
    If the revive process is unsuccessful, Apple Configurator can be used to restore the Serviced Mac. blank
FlexiHub
4.8 Rank based on 386+ Reviews

How to set up Remote DFU Mode on a MacBook Pro/Air

Multiple requirements must be met to enter DFU mode on Mac. If any of these items are missed, you risk the device firmware update failing. To make sure you can successfully boot the Serviced MacBook Pro or MacBook Air, take the following actions and have the necessary equipment on hand.
  • 1.
    You need access to the Serviced Mac over Android phone or FlexiHub-compatible laptop to use as the Intermediate Device, and the Technician's Mac that will be used to perform the revive.
    mac models
  • 2.
    Both the Technician's Mac and the Serviced Mac need to be running the same version of macOS at 10.15.6 or later.
  • 3.
    The Technician's Mac and the Serviced Mac need to be equipped with USB-C ports.
  • 4.
    You will need a USB-C to USB-C cable that supports transferring both power and data. An Apple white charging cable is ideal for this purpose.
  • 5.
    Download and install FlexiHub on the Technician's Mac and Android phone or compatible laptop running Windows, macOS, or Linux (Intermediate Device).
    download
  • 6.
    Internet access is required for the Technician's Mac and The Intermediate Device.
  • 7.
    Download the latest version of the Apple Configurator software on the Technician's Mac.
  • 8.
    The cable can be plugged into any port of the Intermediate Device. You need to use the following specific USB-C ports on the Serviced Mac.
  • • To restore an M1 Mac Mini over the Internet, you need to plug the cable into the rear USB-C port furthest away from the Trackpad. Use this port for all Macs running the M1 chip.

  • • For MacBooks with an Intel chip, the plug should be connected to the USB-C port closest to the Trackpad.

Compatible Mac and MacBook models

The revive and restore instructions we provide are applicable for these Macs running an Apple silicon chip:


MacBook Pro (13-inch, M1, 2020) Mac mini (M1, 2020) MacBook Air (M1, 2020) MacBook Pro (14-inch, 2021)
MacBook Pro (16-inch, 2021) iMac (24-inch, M1, 2021) Mac Studio (2022) MacBook Pro (13-inch, M2, 2022)
MacBook Air (M2, 2022) Mac Pro (2023) Mac Studio (2023) MacBook Pro (14-inch, 2023)
MacBook Pro (16-inch, 2023) Mac mini (2023) with M2 Mac mini (2023) with M2 Pro MacBook Air (15-inch, M2, 2023)

How to Enter DFU Mode on an Intel or Apple Silicon Mac

Once you have met the requirements discussed above, you might still encounter problems trying to enter DFU mode on the Technician's Mac. Based on your Mac’s model, perform the following steps carefully. Even a small mistake might cause the reboot to fail.
  • 1.
    Turn off the Serviced Mac by unplugging a desktop machine from its power source for 10 seconds. On a MacBook, hold down the power button for five seconds.
  • 2.
    Connect the Serviced Mac and the Android or laptop used as an intermediate device with a USB-C cable.
  • 3.
    Open Apple Configurator on the Technician's Mac but do not launch the application until the two Macs are connected. You will need someone to press the keys on the Technician's Mac to enter DFU mode since you won’t see the activity on the screen.
  • 4.
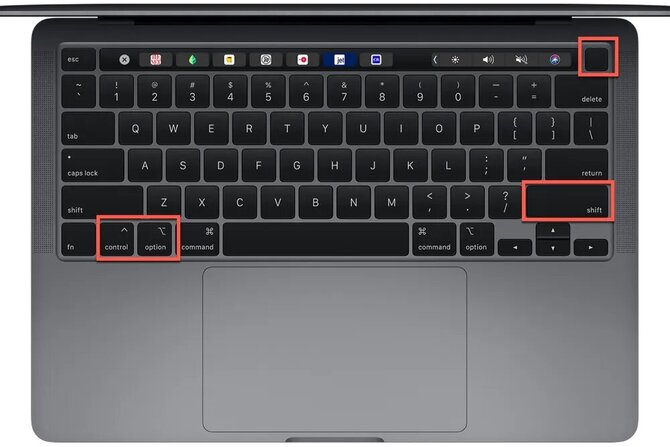
    Restart the Technician's Mac by pressing down the right Shift key + the left Option key + the left Control key while holding down the power button for at least 10 seconds. For a desktop Mac, hold down the power button and connect the computer to a power source. Continue to press the power button after connecting to power for another 10 seconds.
    enter macbook pro dfu mode
  • 5.
    Right-click the DFU icon on the Technician's Mac.
  • 6.
    Select the DFU icon in the Apple Configurator on the Technician's Mac and the Serviced Mac that you will be attempting to revive so its recoveryOS can be updated to the latest version.
    dfu-macbook
  • 7.
    Do one of the following:
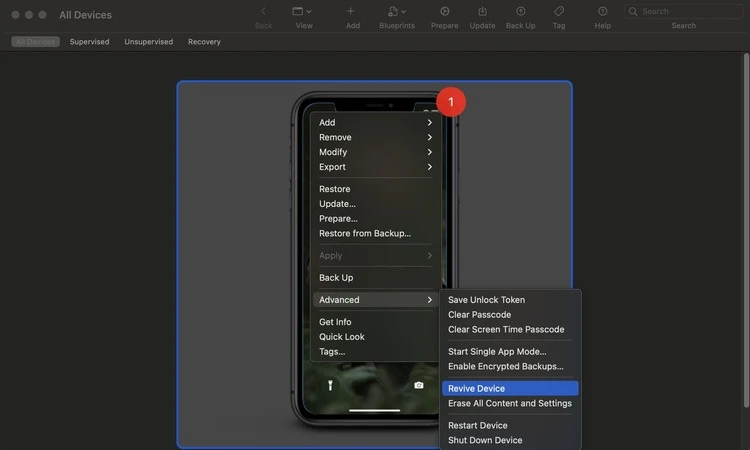
    • • Choose Actions > Advanced > Revive Device, then click Revive.
    • • Control-click the selected DFU icon, then choose Advanced > Revive Device, then click Revive.

    Note: If power is lost to either Mac during the process, restart the revive process.

  • 8.
    Allow the revive process to complete. While the process runs, you will see an Apple logo appear and disappear on the Serviced Mac. When the process is complete, the machine will reboot.

If the revive is unsuccessful, you may have to restore the Mac with the following procedure.

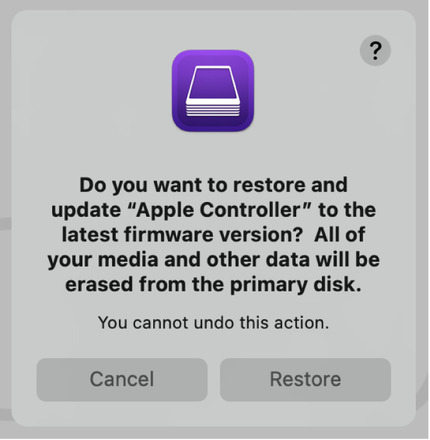
Restore firmware on the Serviced Mac, erase all data, and reinstall the latest version of macOS and recoveryOS


  1. On the Technician's Mac, use Apple Configurator to select the DFU icon of the Mac to be restored.

  2. Perform one of these actions:

    • • Choose Actions > Restore, then click Restore.
    • • Control-click the selected DFU icon, then choose Actions > Restore, then click Restore.

    Note: If power is lost to either Mac, the process must be restarted.

    dfu-restore
  3. Let the process complete. While the restore is running, the Apple logo will be displayed and then disappear on the Serviced Mac.

  4. When the process is complete, the Serviced Mac will restart.

  5. If the restore is successful, you will be presented with the macOS Setup Assistant on the Serviced Mac. If you don’t see the Setup Assistant, the restore process must be repeated.

  6. Quit the Apple Configurator application on the Technician's Mac and unplug all adapters and cables.

FAQ

The revive process is used to update both the firmware and recovery OS to the latest available version. This process does not make changes to the machine’s startup or data volumes so that user data can be recovered.
When you perform a restore on your Mac, the firmware and recovery OS are updated to the latest version. This process also erases the current version of macOS and installs the latest version on the machine. A restore makes it impossible to recover data stored in internal storage.
DFU and Recovery Mode are both meant to recover a non-functioning Mac without reloading the operating system. They accomplish this in very different ways.

DFU mode is a hardware-centric feature that is part of the Mac’s SecureROM. End users should not use this facility and it should only be employed with a corrupt recovery partition.

macOS Recovery is a software process that is built into the operating system. In Recovery mode, the system boots from a hidden recovery partition. This provides users with a minimal operating system that can be used to repair the machine.
If you have access to another Mac, you can connect the two using a cable and utilize Target Disk Mode to transform your unresponsive MacBook into an external drive. This method enables you to transfer files from the malfunctioning Mac to a new one.
Remote Mac Restoration: How to Revive Unresponsive Systems
  • 4.8 overall rank based on 386+ Reviews
  • Requirements: Windows, macOS, Linux, Android and Raspberry Pi.
  • 10.45MB Size.
  • Version 6.1.15025. (19 Feb, 2024).
  • Pricing starts $14 per month billed annually