If you need to share a printer over network, Windows machines got the option to do it with HomeGroup. You may read the full guide in our article. But in April 2018, this feature was removed by Microsoft from Windows 10 platform. So, if you run the latest Windows update on your PC, you won’t be able to share your printer. Instead, you can rely on other tools that have always been a part of Windows.
So, in order to make your printer accessible for other computers, you should first connect it to your local PC and check whether you can print to it from the computer.
Then, head to the Control Panel and choose "Devices and Printers". Right-click the printer you’d like to share over the network and select "Printer properties" from the context menu. After that, go to the Sharing tab.
Note: that it won’t be possible to share the printer if the machine to which it is connected is in the sleeping mode or is shut down.
As for the password protected sharing, all users that want to access a shared printer remotely will need to type a username and password when they first connect to the device. They won’t have to do it each time they access the printer though. Also, you can allow printing to your device from any guest PC. In this case, there won’t be any password protection.
Enable the option ’Share this printer’ there. You can also change the name for the printer you’re going to share, if necessary.
FlexiHub
FlexiHub is a cross platform software which will help to share printer to network. If you are looking how to connect a network printer - just install the software on your machine. You won’t need any additional settings or long cords and hardware. Just FlexiHub!
One more useful option is the ability to render print jobs on client machines. If you enable this feature, the documents will be rendered on the computers where the printing is done and not on the one where the printer is connected physically. This will help to protect the “server” system from being impacted when clients use the device.
After that, simply click ‘Apply’ and make your printer available for access on your network.
You will need to do a little configuration to enable a printer that is directly connected to a network to be accessed from other computers on that network. The following steps will let you share the printer across the network.
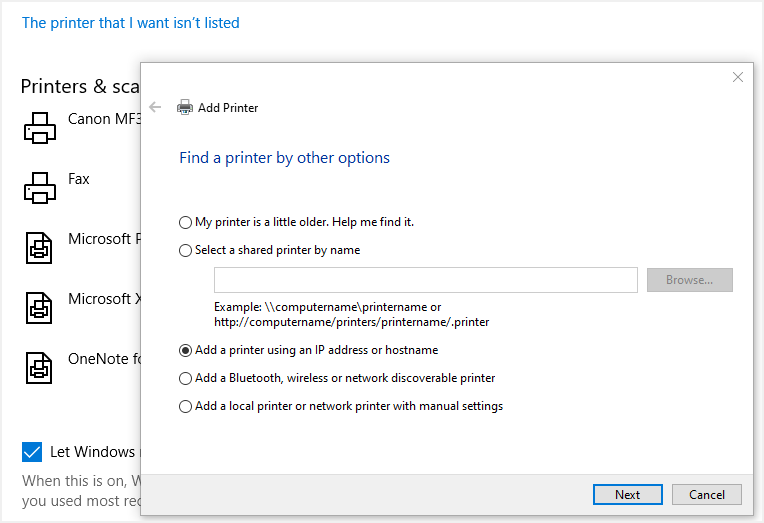
The options presented are all easy to perform and include short wizards that make it easy for you to connect a network printer. We will concentrate on connecting the printer using TCP/IP as it is the most reliable method available. Click on the “Add a printer using a TCP/IP address or hostname” selection and then the "Next" button.
Not everyone knows how to connect to a network printer, but it is a relatively easy procedure once you understand the steps. The following process can be used to add one or several computers to a Mac desktop machine or a MacBook.
Printers can be connected wirelessly using Bluetooth or a Wi-Fi Protected Set-up (WPS) connection. In most cases, connecting via WPS is done by initiating connectivity and pressing the "WiFi" or "Wireless" button on the printer. The precise steps will be determined by your printer and router so you should consult their documentation for further instructions.
After the printer is accessible on the network, you can proceed to the steps required to add it to your Mac.
Note: You may have to provide administrator’s credentials after clicking the Lock icon to make changes to this menu.
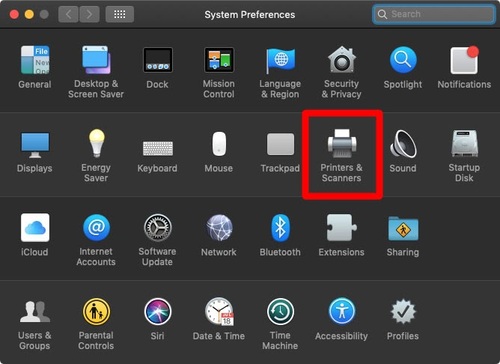
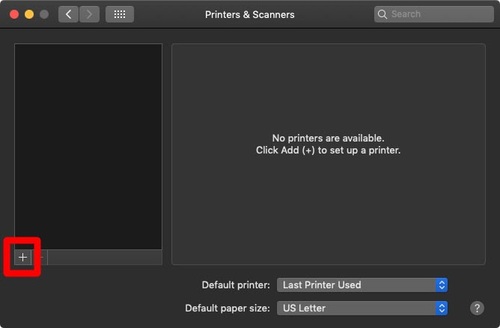
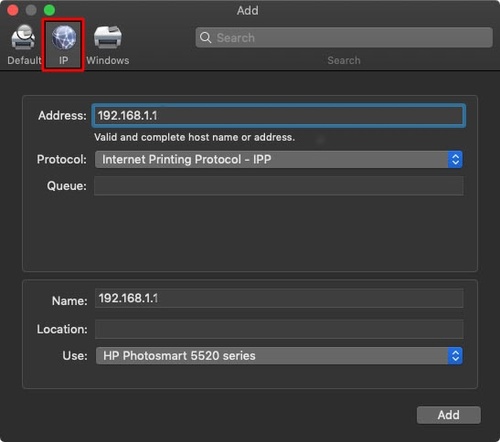
To add a printer using its IP address, you need to have the address information available. You can consult our previous articles if you need help determining the device’s IP address. Once you know the IP address, go to "Printers & Scanners" in "System Preferences" to add the printer by using the following procedure.