Cookie
FlexiHub Team uses cookies to personalize your experience on our website. By continuing to use this site, you agree to our cookie policy. Click here to learn more.
USB Redirector

How to access Remote Serial Port? 2024 Full Tutorial

If you are someone that makes use of serial devices like printers, cameras, and projectors, you will at some point require access to a remote serial port over a network.

FlexiHub is an application that would assist you in this regard. A free 30-day demo version is available to test the product.

Olga Weis Olga Weis Last updated Apr 23, 2024

How to access remote COM port?

In order to access COM ports over a network, you need to set up the serial port for remote access on the remote computer.

When you connect a serial device to the serial port of the Serial Computer (the server is the local computer where the serial device will be attached), the device will appear in the list of devices on the client machine.

A virtual port that is created will behave exactly like an actual physical port. Any device connected to the server machine will be accessible by the client as if the device was physically attached to the client.

How to access remote serial ports over Ethernet

  • 1.
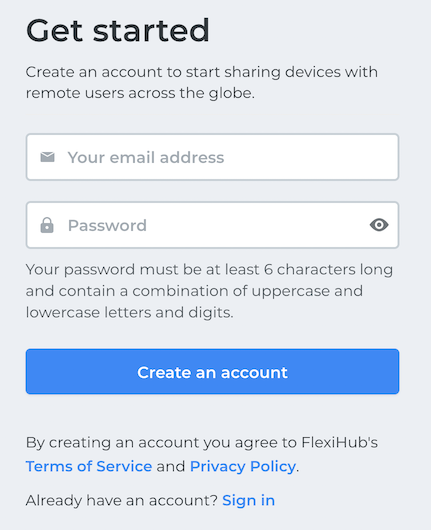
    Head on over to FlexiHub and create a demo account.
    create a demo account
  • 2.
    Install FlexiHub on the computer that will be the server, i.e. where the remote device will be connected. Once installed, launch FlexiHub and log in to your account with the credential you provided in Step One.
    Install FlexiHub on the computer that will be the server
  • 3.
    Now install the application on the client machine (the machine from which you want to access the remote serial port). Log in to your account after installation.
    Log in to your account after installation
  • 4.
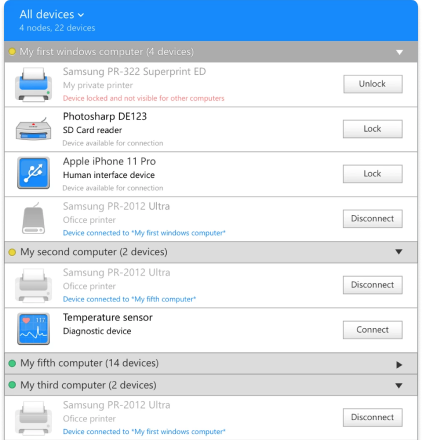
    From the device list on the client machine, select the serial port you want to access and click the “Connect” option. The device will now be accessible and fully functional on the client machine.
    select the serial port you want to access and click the Connect option

FlexiHub simplifies the process of accessing remote ports regardless of the physical distance between client and server machines.

Linux remote serial port

It’s time to discuss how to access remote serial port over ethernet. But first, we’ll provide a brief overview regarding serial port data remote Linux connectivity.

Linux’s derives its name for serial ports from UNIX tradition.

  •     ● The first serial port is called: “/dev/ttyS0”
  •     ● The second serial port is called: “/dev/ttyS1”
  •     ● The third serial port is called: “/dev/ttyS2”
  •     ● Etc

This is different from IBM’s traditional PC philosophy (i.e., COM1, COM2, and COM3 etc.)

Unfortunately, Linux lacks "virtual serial ports". However, Linux does have a file that supports additional “ioctls”. If users don't need those, they can attempt to redirect using tools like “socat”.

If users figure out how to send a device’s serial data over an IP connection (via socat on the remote end), they must understand how to convert that IP stream back into a (virtual) serial device.

Linux remote COM port step-by-step guide

Step 1: Using terminal emulators (like PuTTY), launch a console session

Step 2: Select “Serial” as the connection type

Step 3: Alter the Serial line to match the COM port that was listed earlier

Please note: It’s normal for console speeds to reach 9600.


Step 4: Navigate to the bottom of the page and hit “Open” to connect to the console

Please note: Additionally, users can forward COM devices transparently over a network connection.


Users should be able to use the PIPE address-type of socat to create a Unix pipe connection. As an example (assuming the device—functioning with a real serial device—creates a network connection):

socat PIPE:/dev/fakesocatserial0 TCP-LISTEN:1234

Windows remote serial port guide

For those desiring the ability to remote access serial ports on a Windows OS, users can try FlexiHub (from the above tutorial.) Available on Windows, Mac, and Linux, FlexiHub is an excellent cross-platform solution (enabling remote serial port for android devices, for example.)

With just a couple of clicks, FlexiHub allows users to easily access remote COM ports. However, when using Remote Desktop, users can also attempt a connection with a remote serial port.

How to acces a serial port in remote desktop

Follow the steps below to connect devices (with interface RS232) to a PC workstation—as well as transmit read data through an RDP session to a remote application.

Step 1: Setup the desired device to run the appropriate interface RS232

Step 2: Establish a connection from the device to the serial port

Step 3: Map the PC`s serial port from the hardware connection via the RDP server COM

Step 4: Open the serial port mapped during the previous step

Please note: Foreground remote applications (focusing on an input field) recieve the data read by the device.

How to map ports

Step 1: Ensure that serial port redirection is enabled in the Remote Desktop Connection client

Step 2: Click Options from the Remote Desktop Connection window

Step 3: Ensure that “Ports” is checked/enabled (located on the Local Resources tab, beneath Local devices)

Step 4: Hit Connect

That’s it! All local serial ports are available via the same port name (COM1, COM2, etc.,) within the RDP connection.

Now when running remote desktop sessions from a workstation to a Terminal Server, any and all communication within the remote desktop session (using COM1, COM2, etc.) is redirected to the client workstation's local (physical) COM1, COM2, etc.

Another way to think of it is: Within the remote desktop session there are "virtual serial ports" possessing the same name as the physical ports on the client workstation.
Remote Access Software
  • 4.8 overall rank based on 386+ Reviews
  • Requirements: Windows, macOS, Linux, Android and Raspberry Pi.
  • 10.76MB Size.
  • Version 7.0.15125. (3 Jun, 2024).
  • Pricing starts $14 per month billed annually